In this guide we will help use Matomo On-Premise with SiteSEO.
Setup Self Hosted Matomo
You will need to install Matomo first before we can begin with how to use it with SiteSEO. If your host provides Softaculous then you can install it using it else you can check the official Document from Matomo.
Once you have installed Matomo, now what you need to do is login in to your Matomo account.
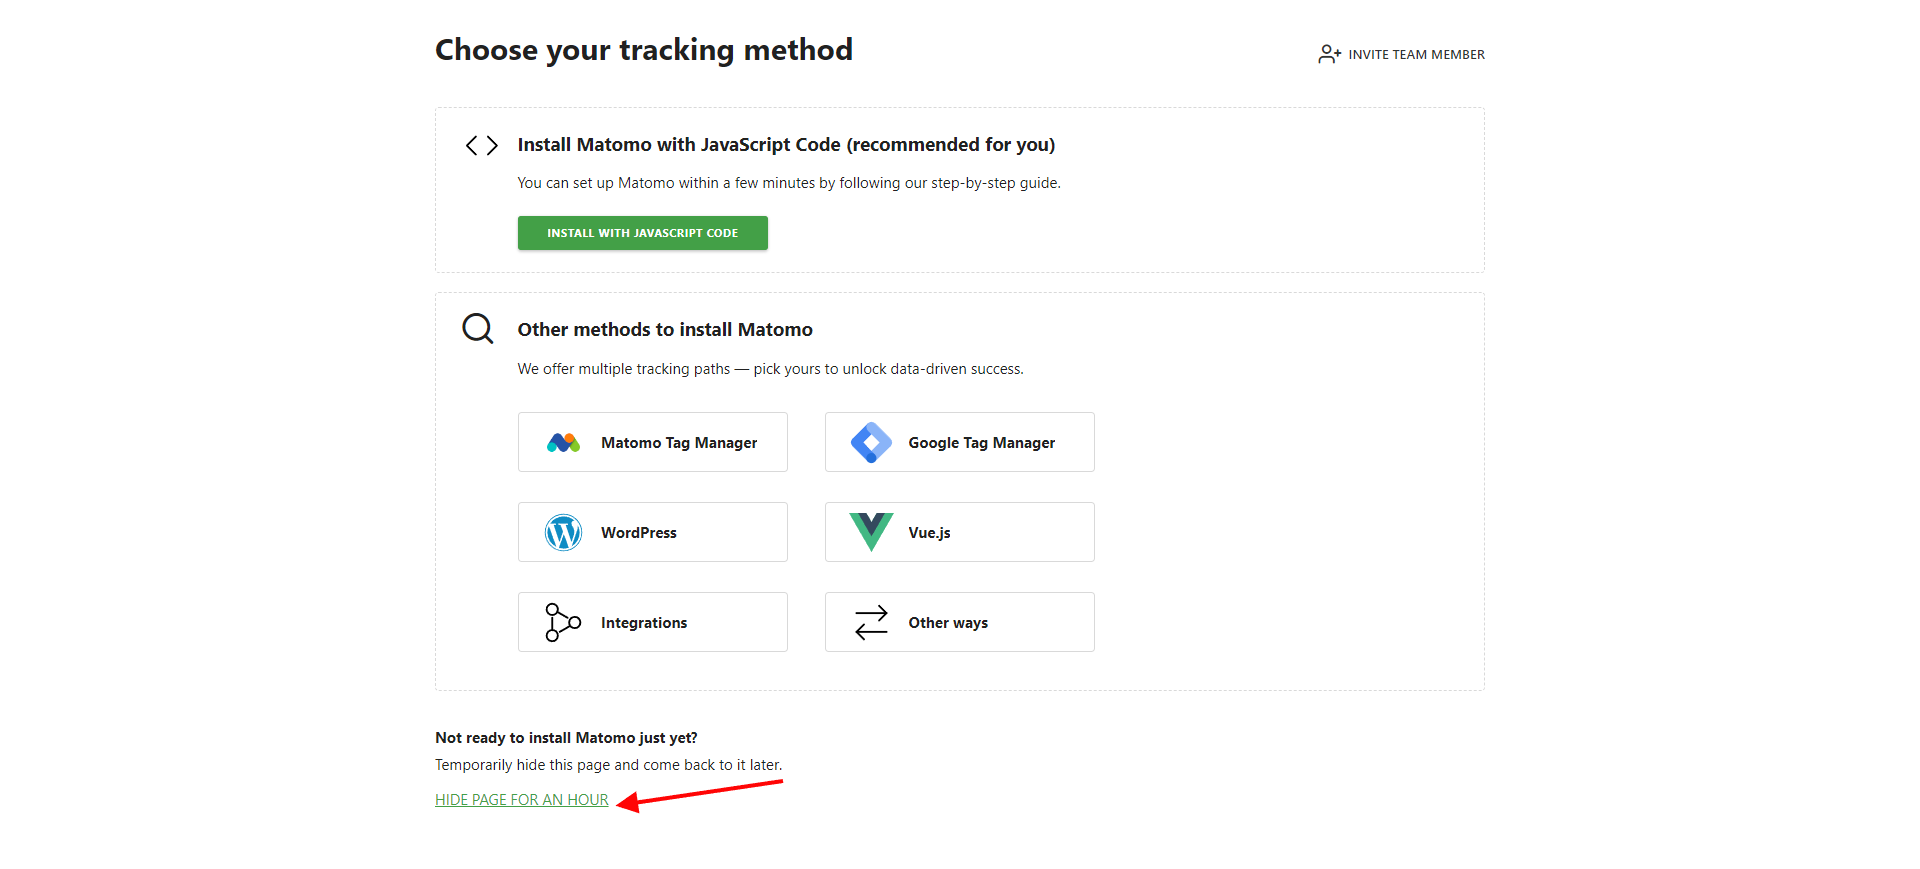
On first login, you will see a set-up page, you don't need to worry about this and you can just skip it by clicking on the link which says, Hide for one hour as shown in the image below. As SiteSEO handles adding code to your website.
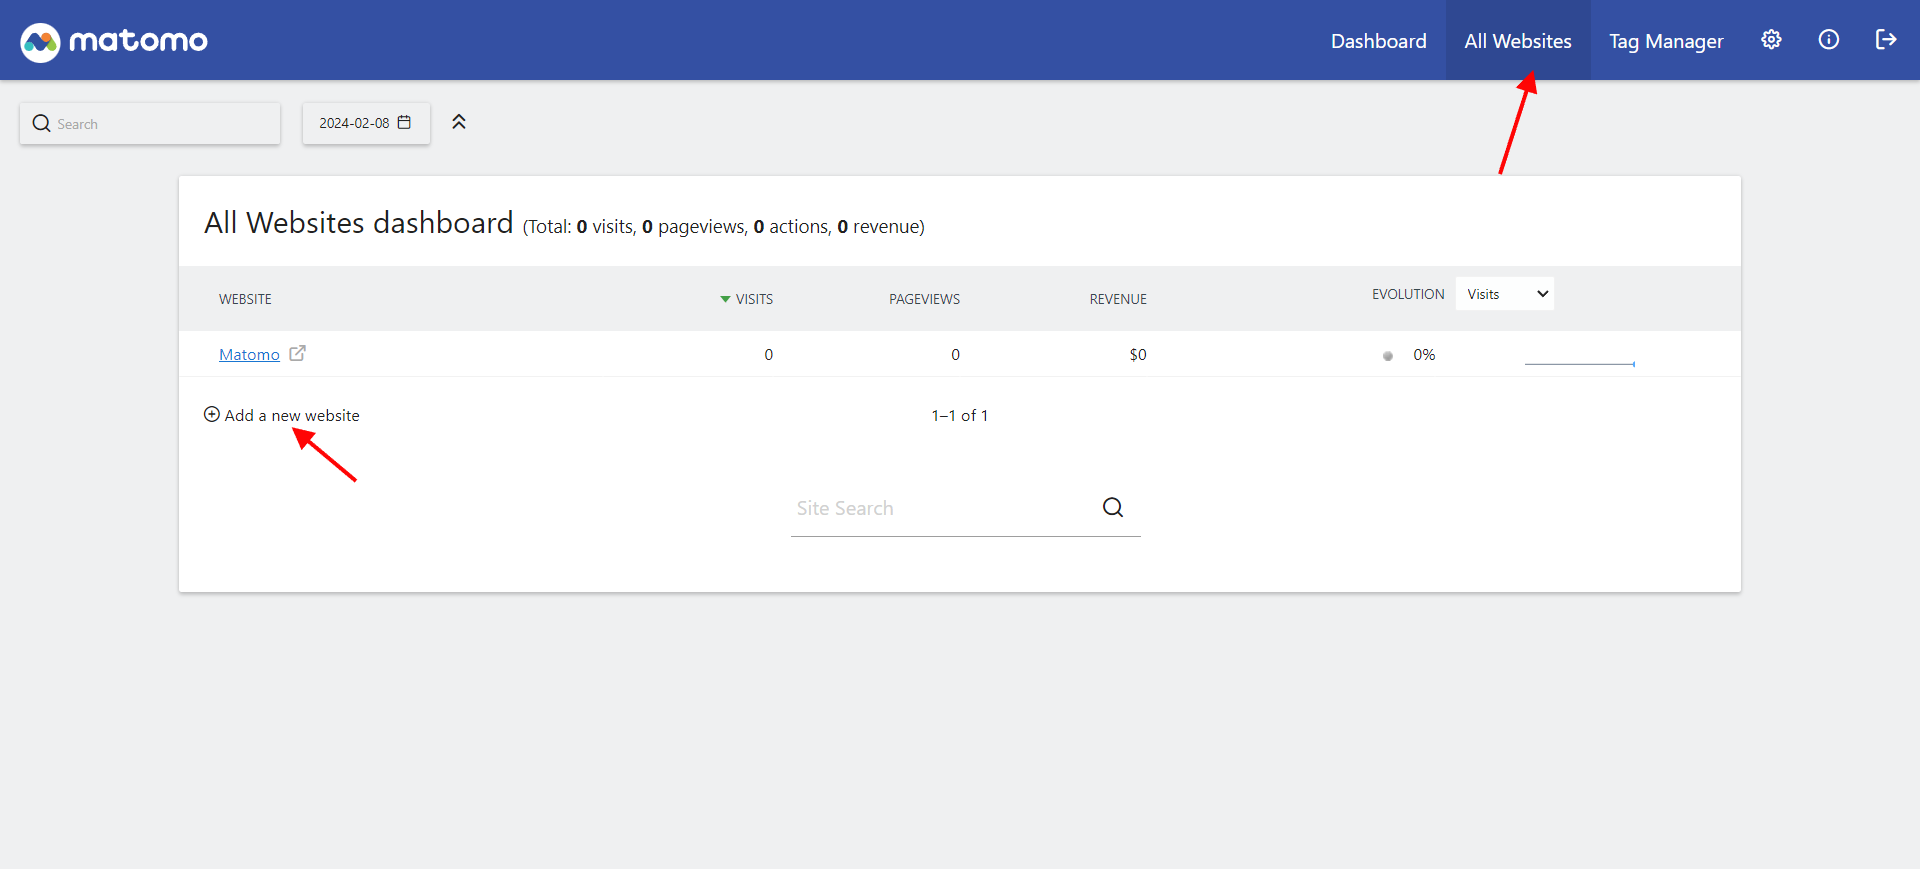
After you skip the setup step, you will see the dashboard page, there in top Navigation Click on All Website and click Add a new website, as shown in the image below.
Now a form will appear, you will need to fill it as per your requirement and save it.
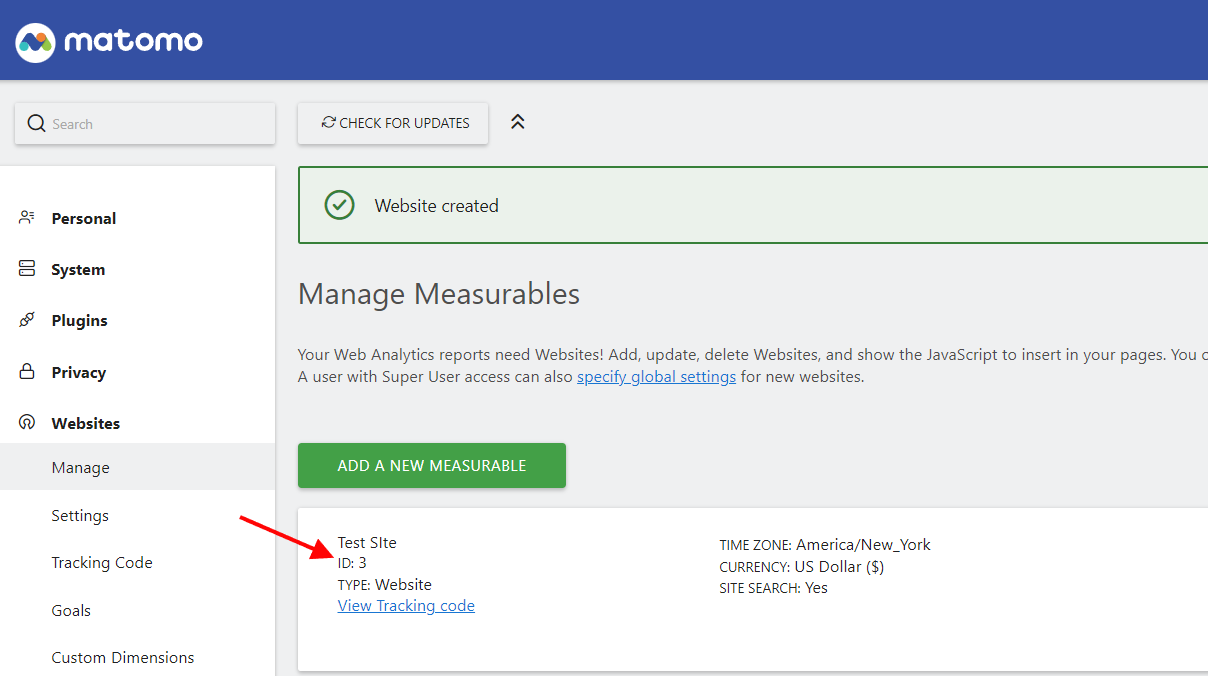
Once you save it you will get the ID of your website you want to use as shown in the image below.
Now we are all set to enable Matomo through SiteSEO, and start tracking our users on the website using Matomo.
Enabling Matomo on SiteSEO
In your WordPress Admin --> SiteSEO --> Analytics --> Matomo
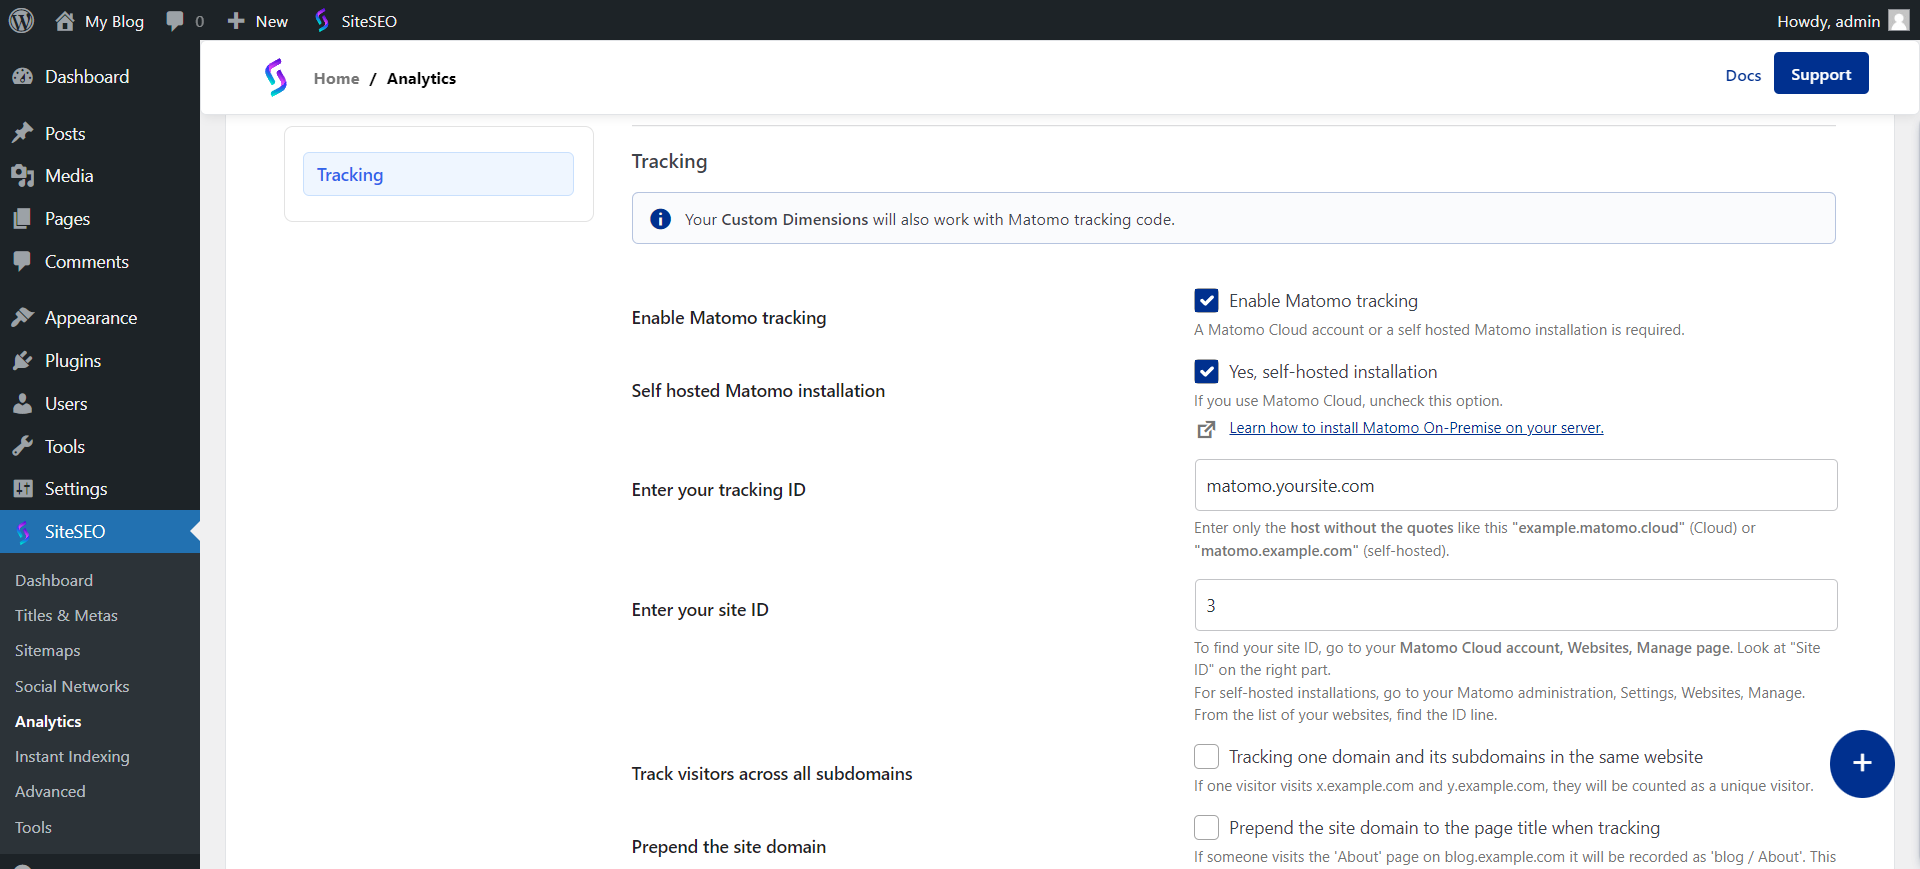
After you have saved these settings its time to test it.
Testing Self-hosted Matomo
Open your website in incognito mode or in another browser, and keep it opened.
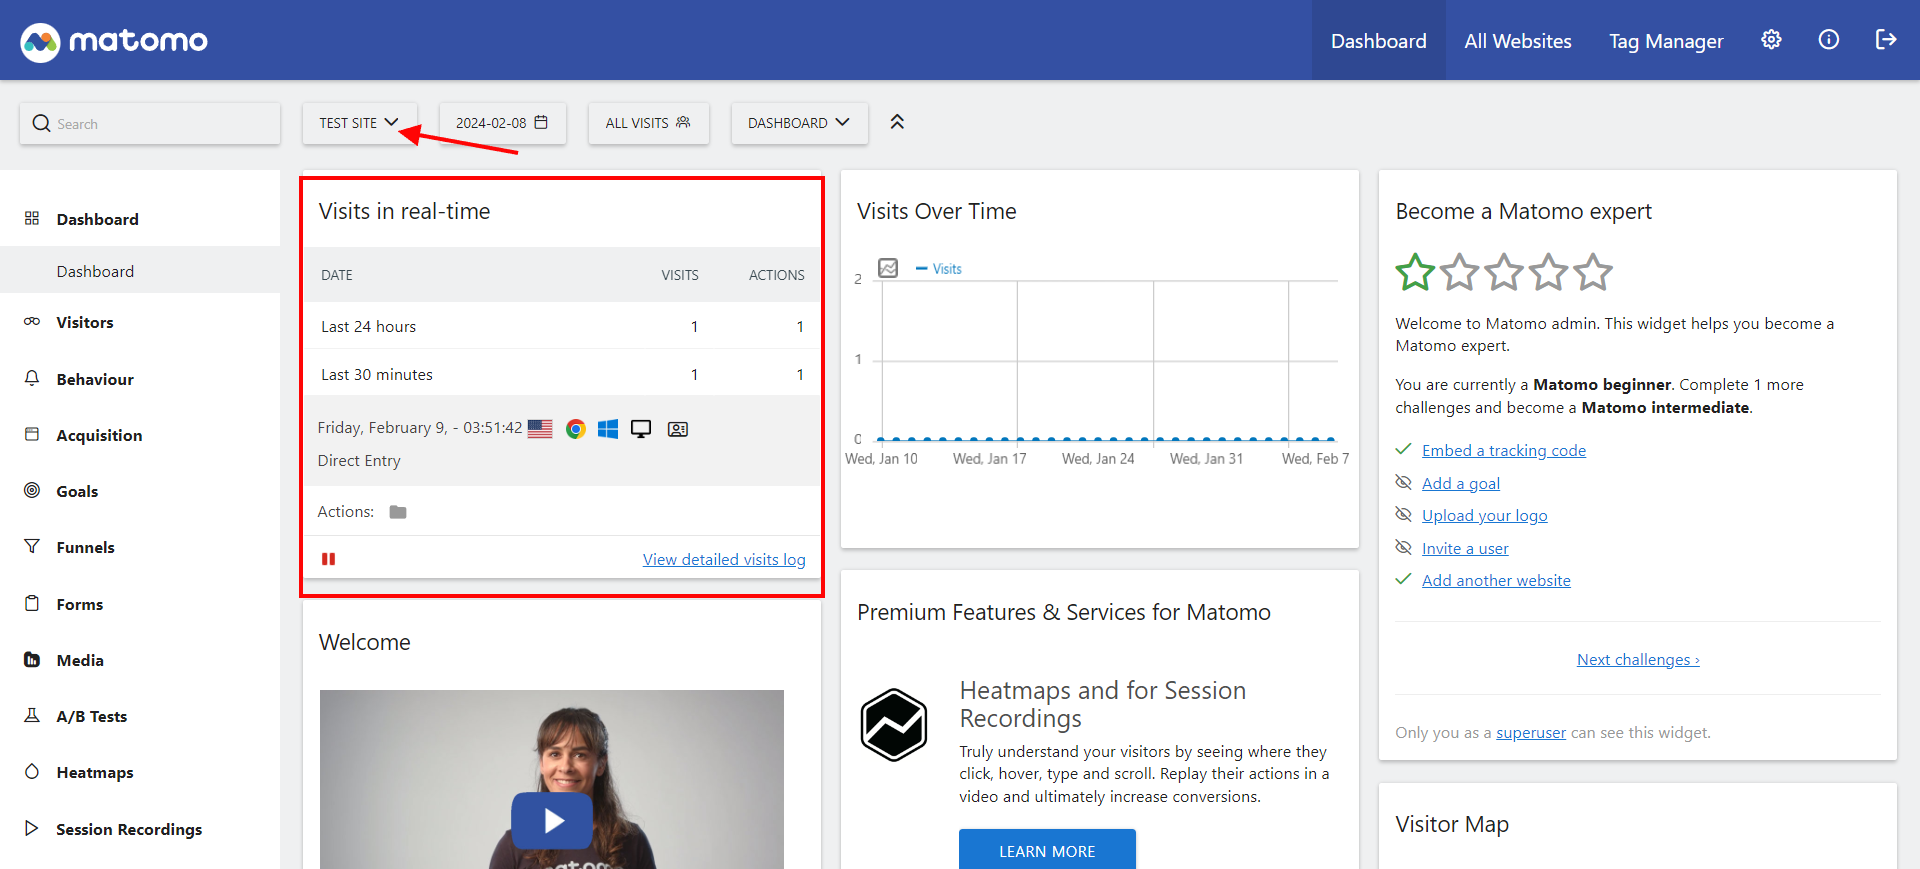
Now in your Matomo Dashboard, select the website you are testing for as shown in the screenshot below, and then see if the Visits in Real time shows anything.
If it is not 0 then it's working, if it stays zero, try refreshing the website you opened, or try opening it in another device like your mobile, just to test it and make sure you either delete cache or disable any cache plugin you have to test.
If you still are unable to setup you can reach out to us at support@siteseo.io we will help you out.