Home » How to add Google Tag Manager
How to add Google Tag Manager

In this guide we will help you on how to add Google Tag Manager using SiteSEO.

Getting the Tag Manager Code
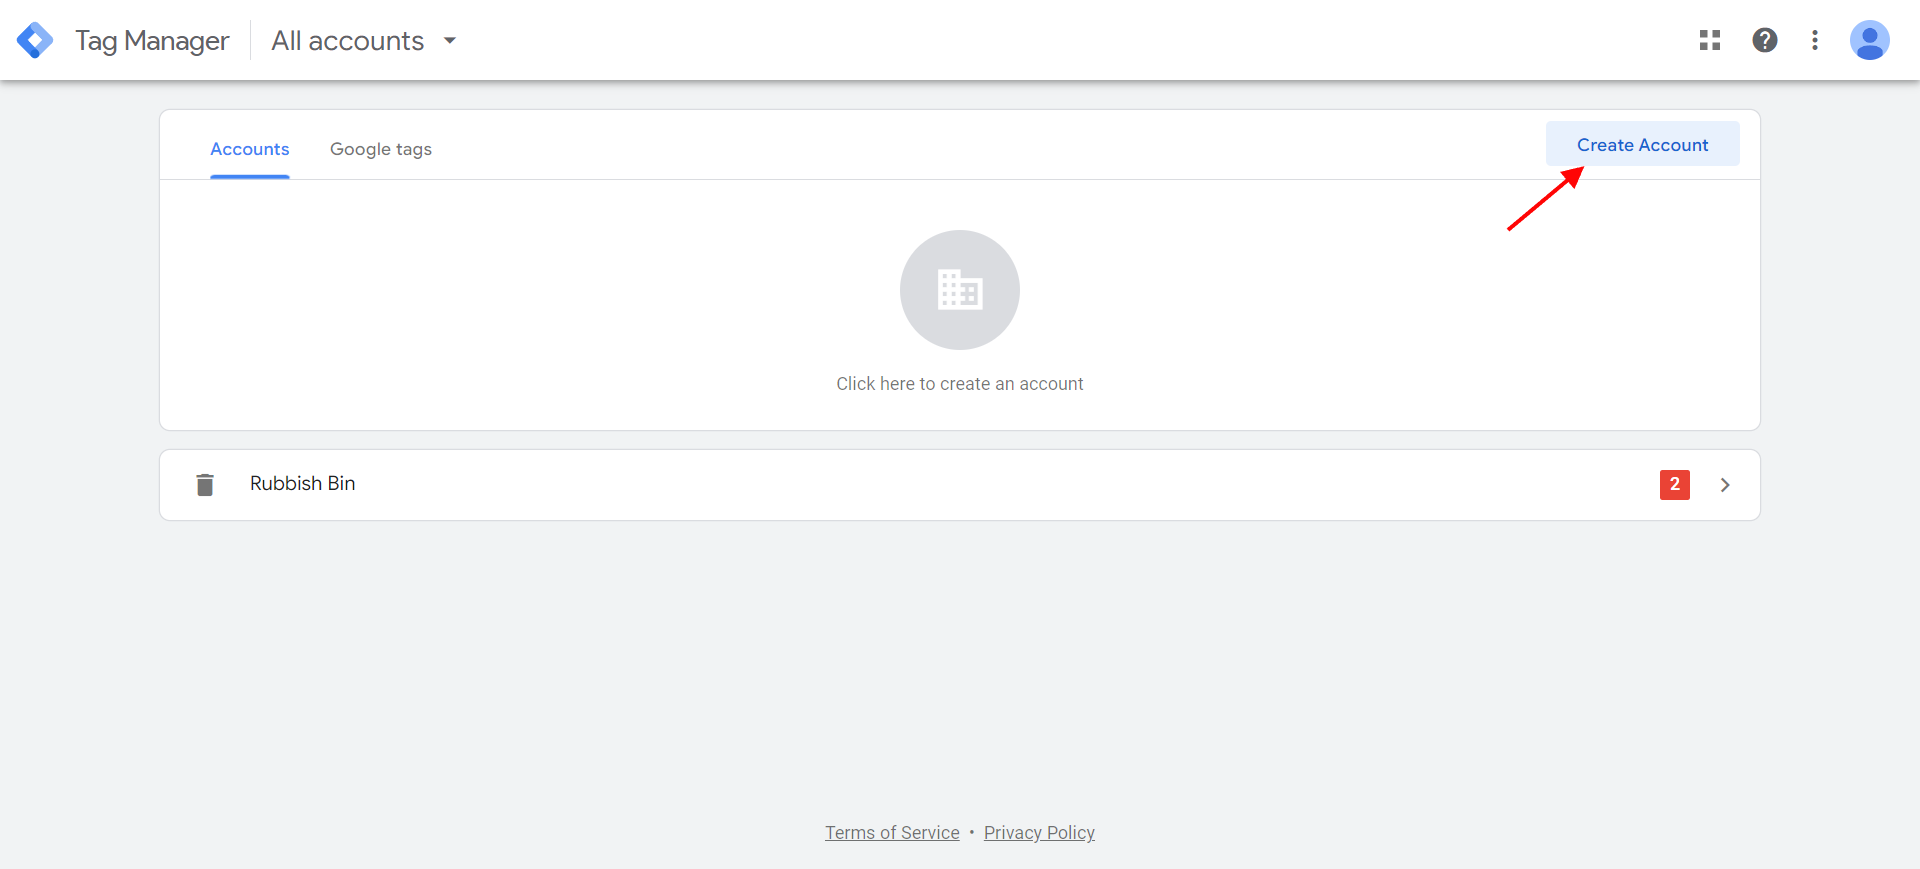
  • Once you login or sign up to Google Tag Manager, if you don't have an account create one. If you already have a account just click on it.
Create Google Tag Manager account
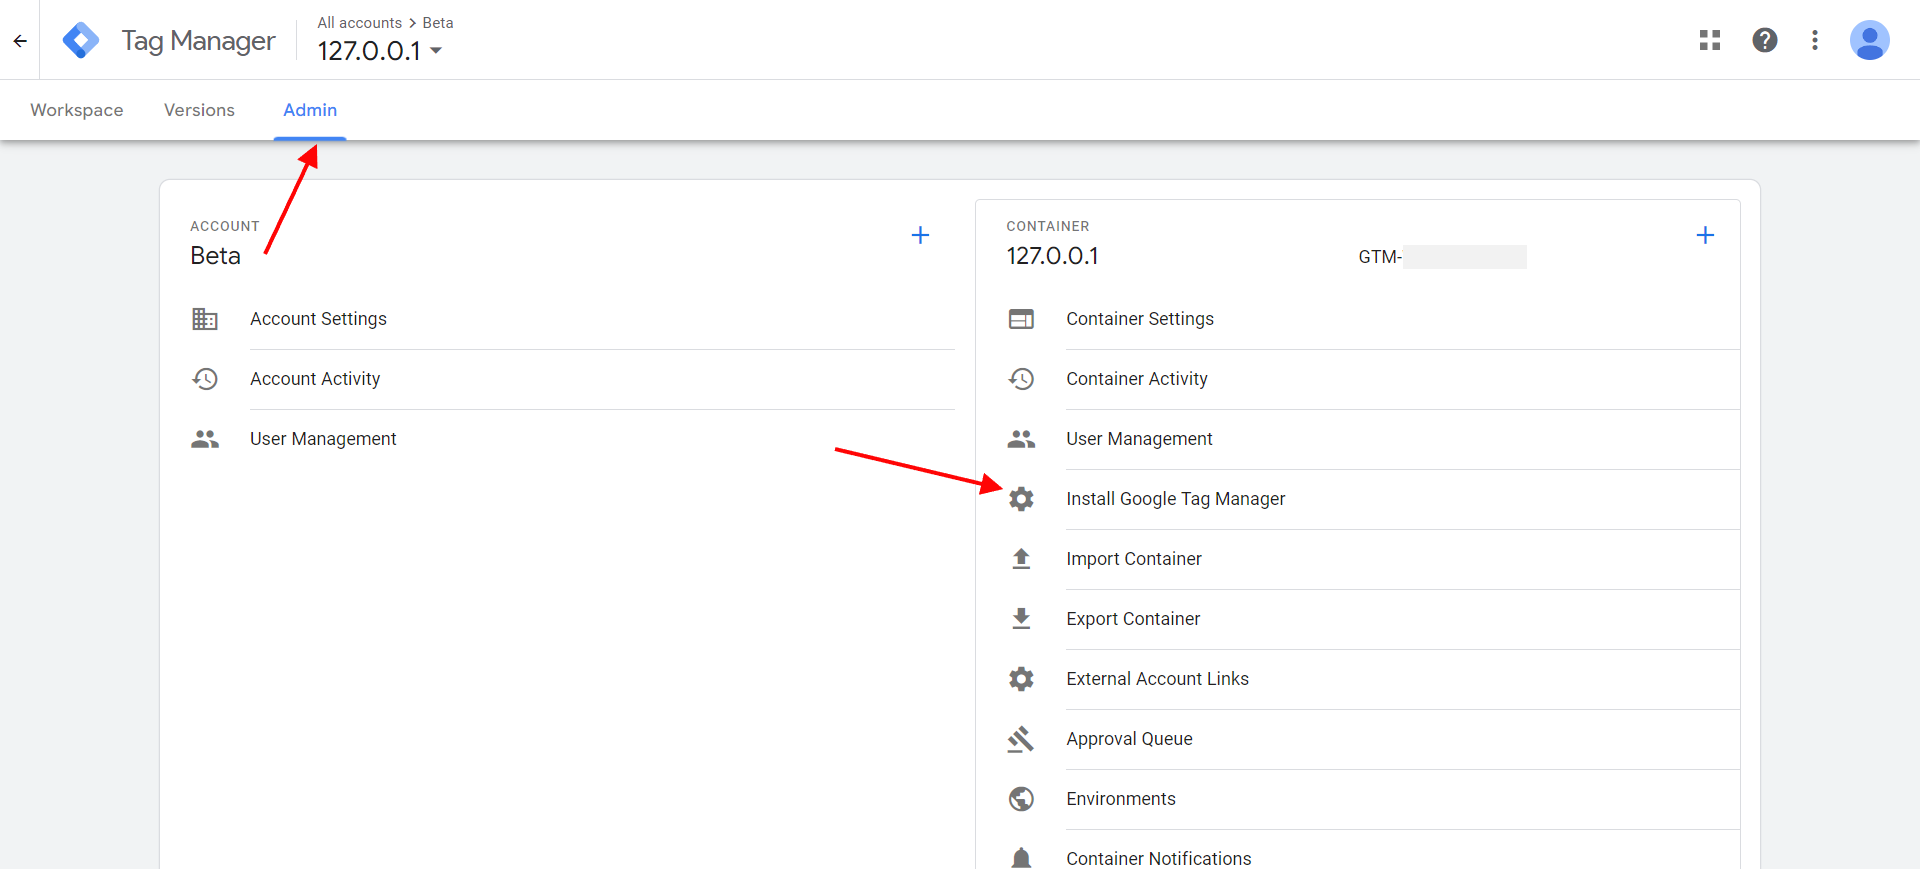
  • In your account click on the Admin tab.
  • In the admin tab under container section click on Install Google Tag Manager. In case of a new account, you will see the code blocks the moment you open the account, if you don't see it follow the this step.
Google Tag manager admin page
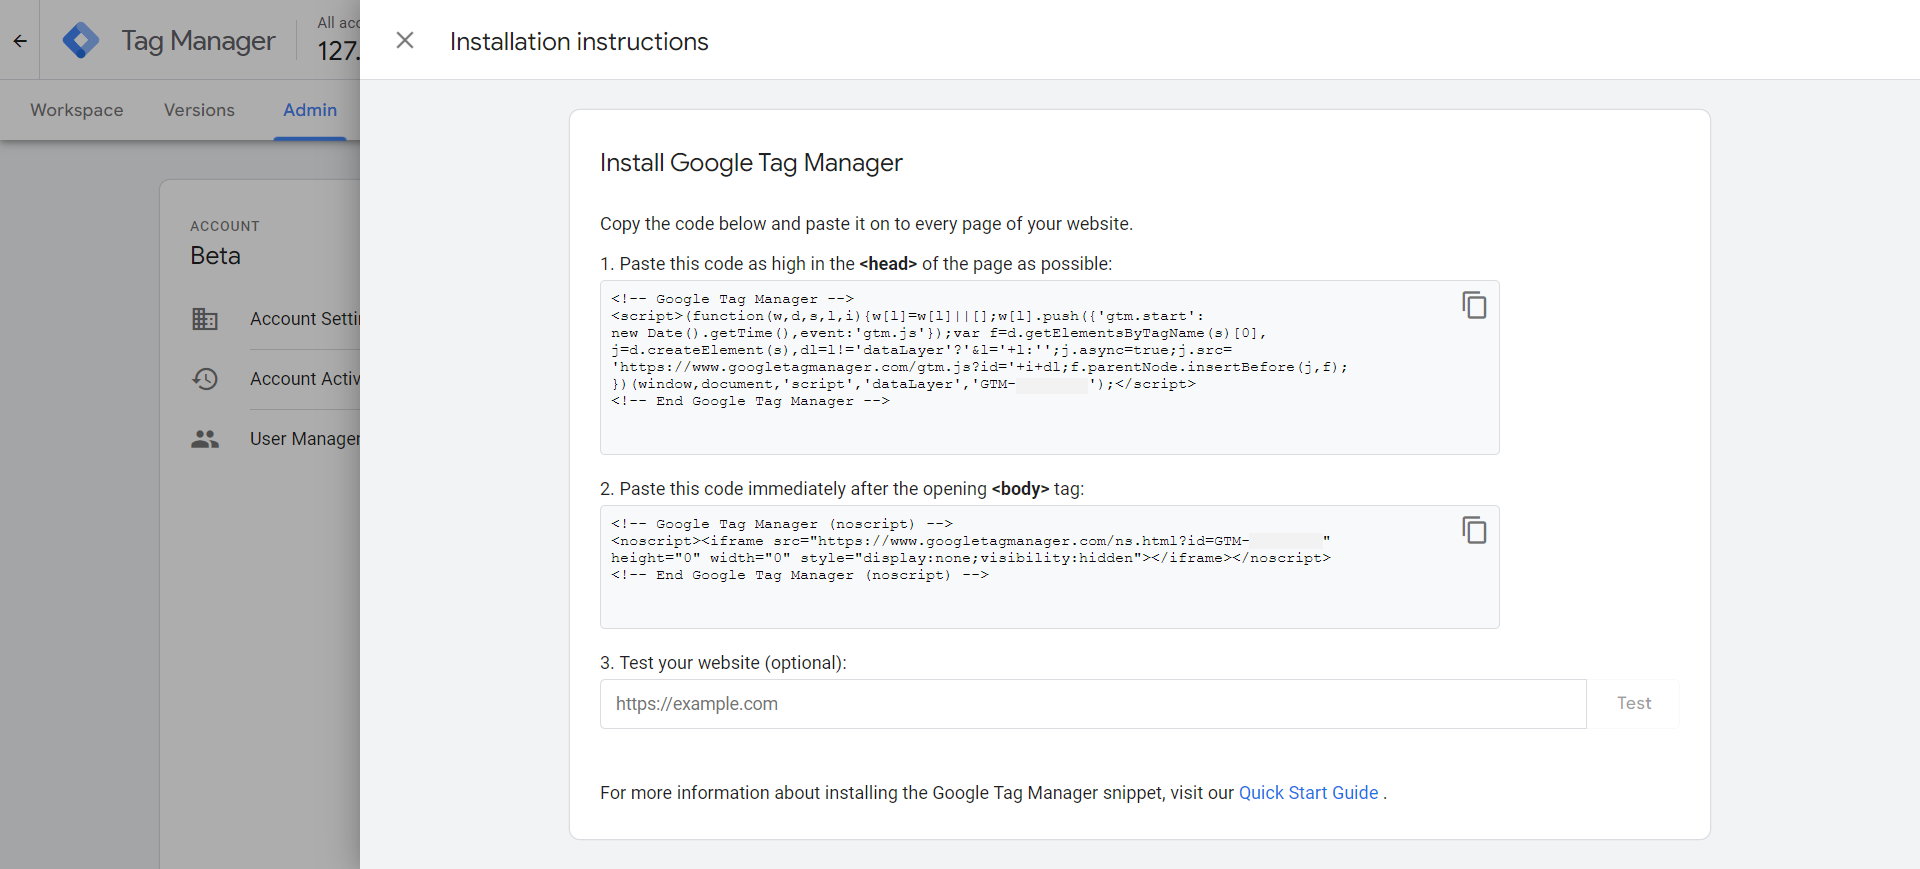
  • A pop-up will slide in which will have 2 blocks of code.
Google Tag manager code blocks

Adding Google Tag using SiteSEO

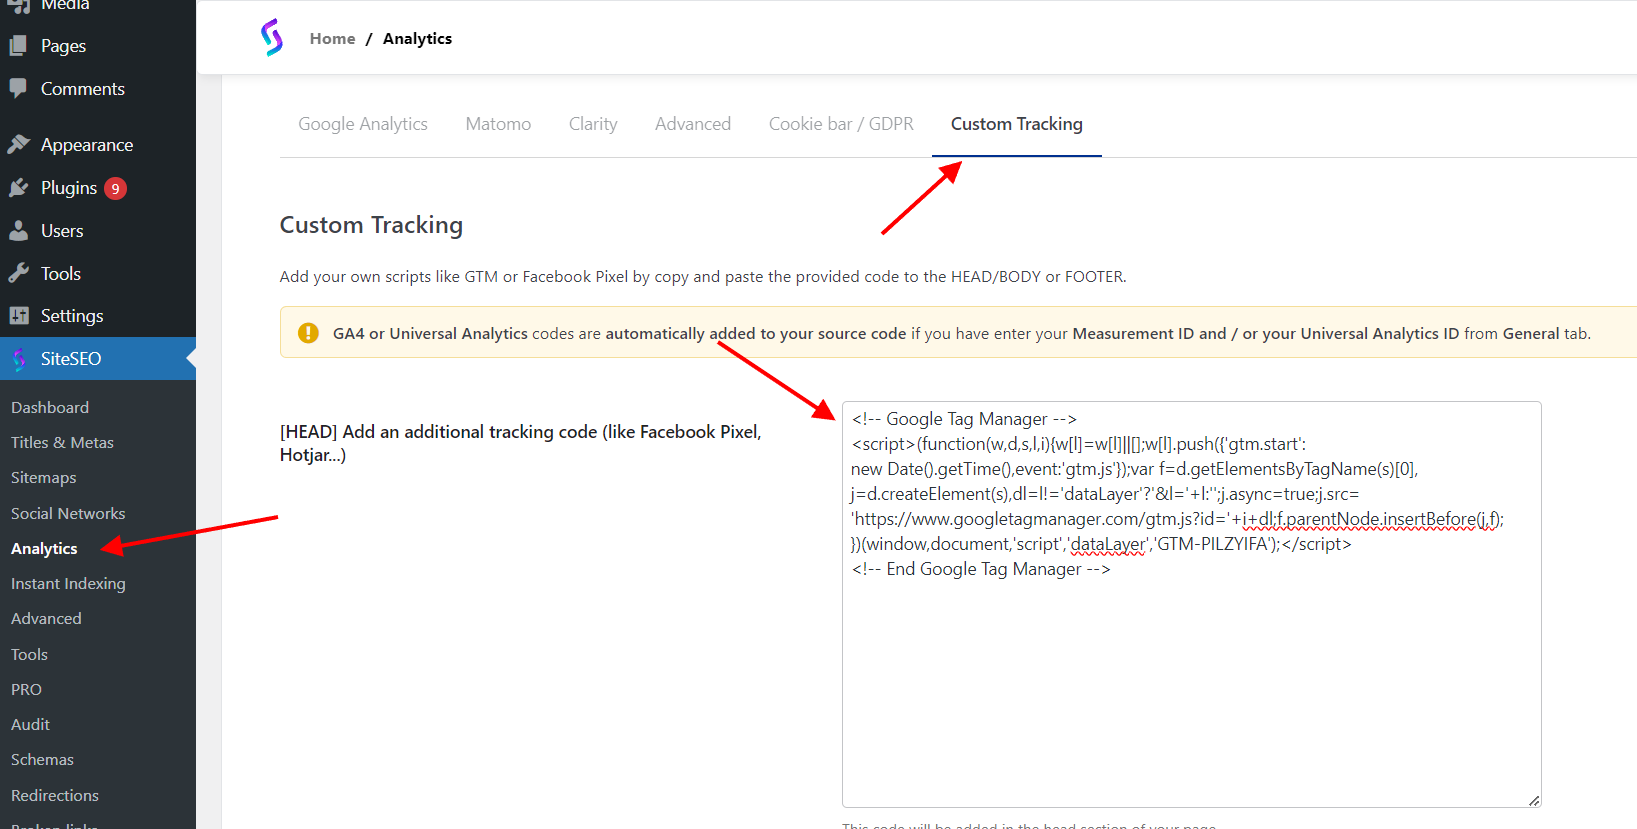
  • In your WordPress Admin go to SiteSEO --> Analytics --> Custom Tracking tab.
  • From the Google Tag manager copy the code which is supposed to be in head tag and then paste it in HEAD field of Custom Tracking tab as shown in screenshot below.
Google Tag manager head code using SiteSEO
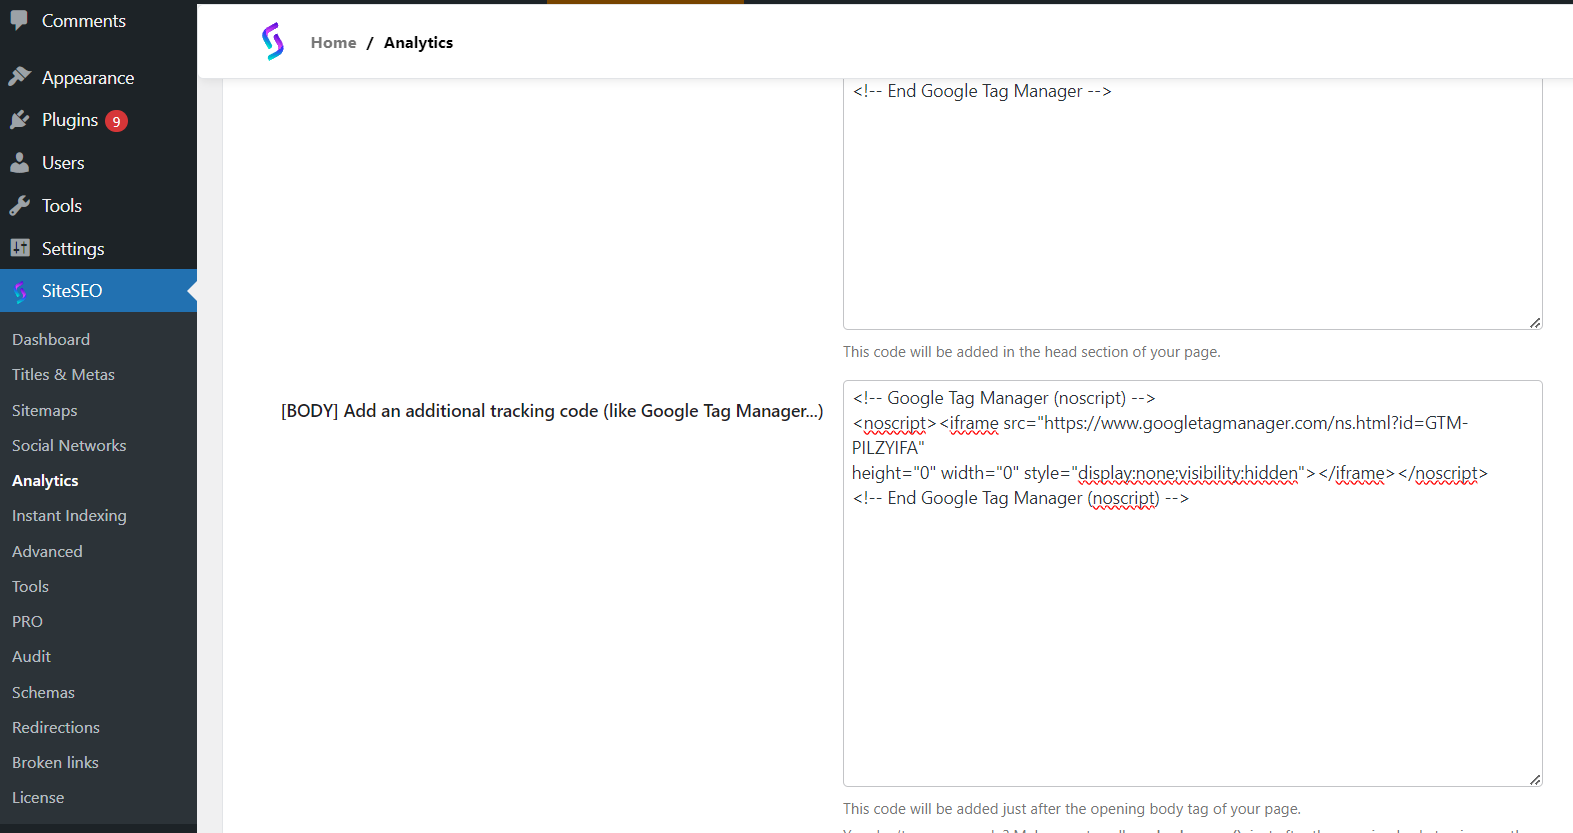
  • Now copy the second block of code from Google tag manager, and place it in the BODY field of the Custom Tracking Tab as shown in the screenshot below.
Google Tag manager code in the body using SiteSEO

After doing this you can save the settings and that's it.

Note: Make sure you delete cache after saving the settings.

Testing Google Tag Manager

You can either test it manually by inspecting your website's elements and see if you can find the code you have just saved.

Or you can test it using Google tag manager itself, from the pop-up you copied the code, there is a option to test if tag manager is successfully added or not too. As shown in the screenshot below.
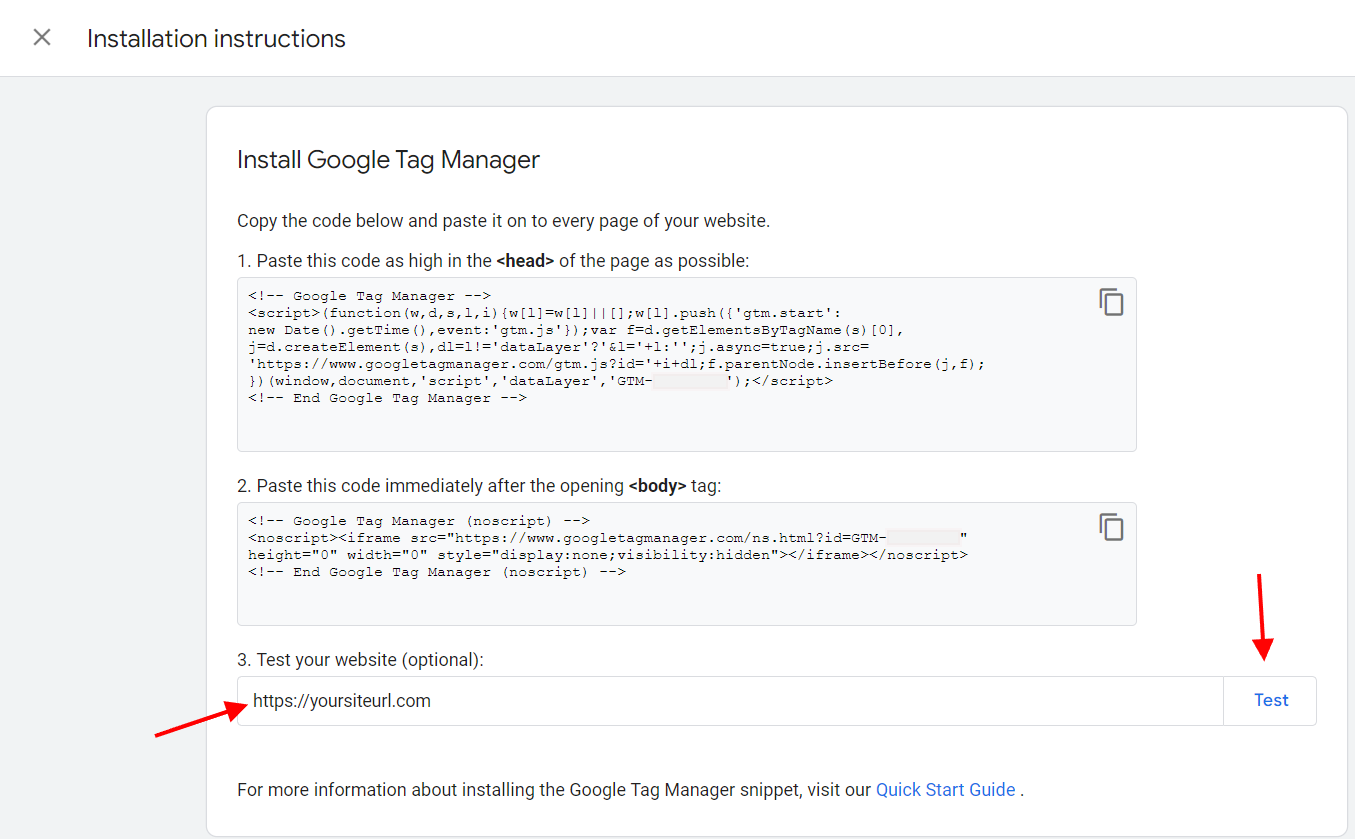
Testing Tag manager integration

If you ace any issue implementing Google Tag manager, you can contact our support team at support@siteseo.io and we will help you out.

    Was this page helpful?
    Newsletter Subscription
    Subscribing you to the mailing list